9/29-10/3
- Kimberly Dao
- Oct 1, 2025
- 3 min read

We only have a four-day week so blog posts were done on Wednesday instead of Thursday. I wanted to recap from my last blog post because I wasn't able to present it to the class last Friday due to my absence.
Last Week
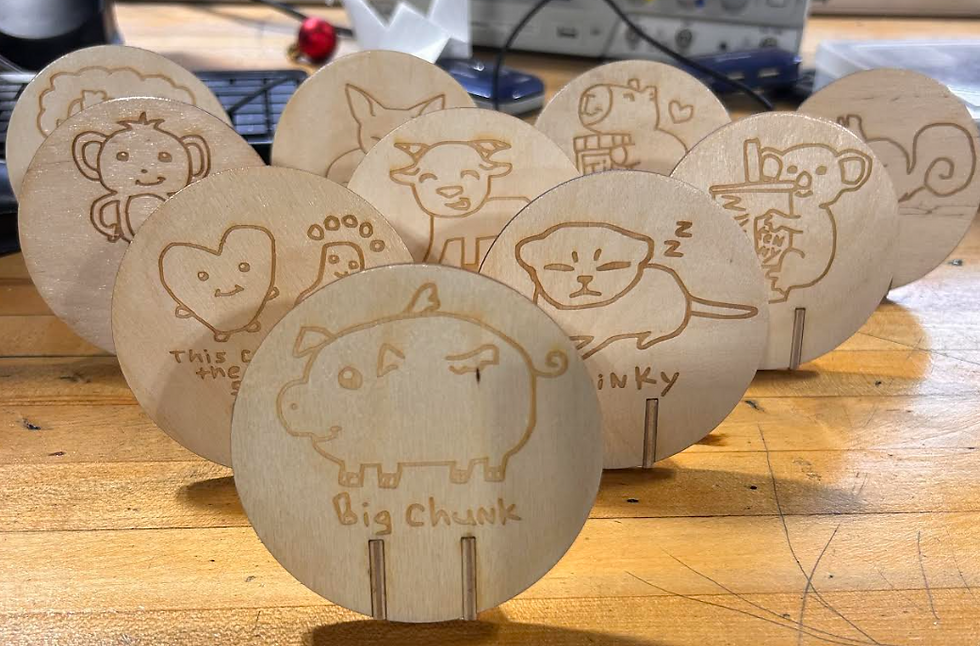
Last week was entirely working on my Mom's birthday gift and helping Jaspreet with hanging up signs. On Tuesday was the actual day I was able to start 3D=printing the Erlenmeyer flask due to another student's project being 2+ hours long. After the print was don't, I removed all of the supports that were attached. I sanded ad spray-painted the piece and repeated with the smaller pieces. When I was home, I was able to paint them all and give it to my Mom in the same day. This is the photo that I took of the finished product:

Monday
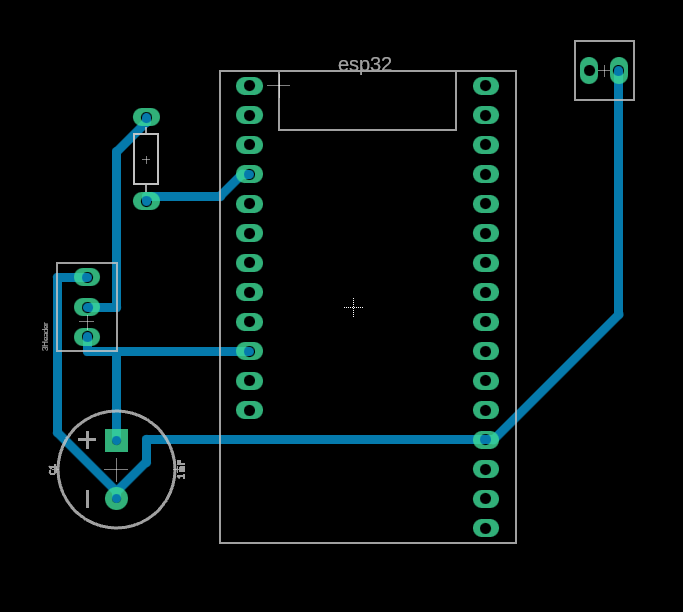
On Monday, I worked back onto the PCB. Due to PE making the time in shop shorter, I was only able to make the PCB schematic into it's document then made that document into its 3D model. After I made the PCB's 3D model on Fusion, I decided to cut it out in cardboard to test the distance of the holes for the ESP32. The distance that I had on the board is correct. After confirming the distance between the holes and placing the components through each hole, I had a good image for what the PCB would look like. I also asked Mr. L for help on how I will attach the power and ground to the PCB from the power supply. He suggested with adding another header in purpose of acting as an input for the polarized connectors to plug in. We decided on polarized connections because it will snap in which means it will ensure no issues if the wires magically slip out.


Tuesday
On Tuesday, I asked about the new board and frame of the Word Clock. I wanted to help with attaching the power supply and PCB to the board. I was able to get measurements of the new board in progress and the power supply. The power supply's length is 8.5 inches, height is 2 inches, and the width is 4.5 inches. Bella was planning to attach the power supply on the side but the distance between the front board and back panel was 4 inches. I didn't get much done on Tuesday because I was allowed to study on a quiz that I had afterschool.
Wednesday
On Wednesday, Bella and I asked Mr. L for help about the three issues we had with making a new board: PCB, power supply, and hanging up the word clock. He gave us a drawing and tips from another project that is partially similar, the large Tetris board located in the shop. The power supply was mounted behind the LED panel and attached with a 3D-printed L-bracket. We decided that this bracket will also have a place for the PCB also so then it would be convenient. I would need to make holes on the board on Fusion then send that model to Bella so then she would be able to cut them into the L-bracket. This is the sketch I provided of the board and power supply.


Comments